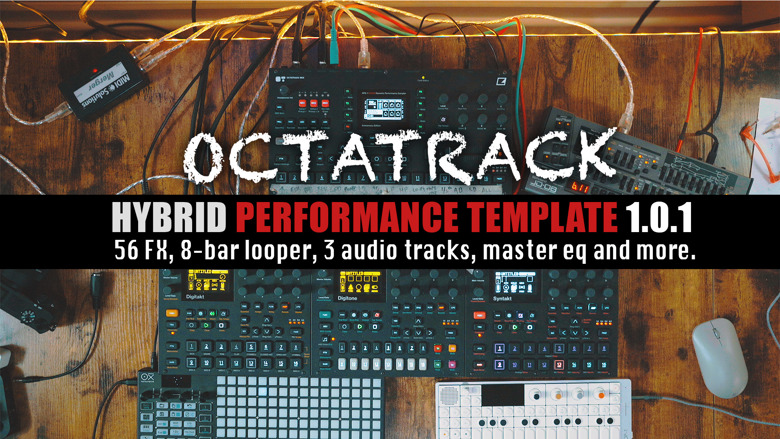
The Hybrid Performance Template is a variation of the Techno Performance Template, designed with sampling in mind. It includes 3 Flex tracks pre-assigned to recording buffers. The recorders are set to target track 3 (the final neighbor track), allowing for post-FX sampling. This template features 56 pre-made scenes, leaving 8 scenes blank for you to design. With its 8-bar structure that syncs seamlessly to the Octatrack's clock or external MIDI sources, the template offers a wide range of effects, including modulated and clocked modulation, sidechain pumping, stutter effects, and a master equalizer. These are all accessible through user-friendly controls. It empowers performers to build tension and deliver impactful drops effortlessly. This template like the others before it are built around two input busses with discreet effects for both. Input A/B is your DRUM or PERCUSSION bus, and input C/D is your MELODIC bus. Additionally, it offers the flexibility to customize compressors and fine-tune the sound to one's liking. Suitable for both seasoned artists and newcomers to electronic music, this template provides an inspiring and versatile platform for elevating live performances and captivating audiences with mesmerizing soundscapes.
Get the official Template Overlay Sticker here: www.modbang.com/modbang-shop/octatrack-fx-template-overlays
Demo and tutorial: www.youtube.com/watch
INSTALL INSTRUCTIONS:
Plug in the USB to your Octatrack -> On your Octatrack press PROJ to enter the Settings -> System -> USB Disk mode ->
Your Octatrack will mount as a disk on your computer. Open your Octatrack drive on your computer and find your set folder (typically called PRESETS MKII if you have a MKII).
Open your set folder on your Octatrack via your computer -> Drop the UNZIPPED project folder called Hyrbrid PT x.x in with your other project folders on your Octatrack.
Press NO on your Octatrack to leave disk mode.
Open the project file called Hybrid PT x.x on your Octatrack.
----------------------------------------------------------------------------------------------------------------------------------------------------------------------------------------------------
Hyrbid Performance Template x.x Manual by EZBOT
All Banks and Patterns are populated with the Hybrid Performance Template at a default tempo of 130 BPM and a pattern scale of 128 steps (8 bars). This is an 8 bar template with many effects that have clocked modulation over 8 bars for builds up and drops.
***Clicks and pops can be caused by unstable BPM from external clocking sources. To avoid this use a stable clocking source such as the Octatrack itself.
***Audio MIDI Channels are disabled by default.
- Effects with an asterisk have FREEZE delays.
***Be sure RECORD QUICK MODE is enabled in your system settings. --> PROJECT --> SYSTEM --> PERSONALIZE --> RECORD QUICK MODE (ENABLE)
***Be sure CUE MUTES TRACK IS ACTIVE if you plan to run the FLEX tracks through the FX BUS via the external CUE OUTS. --> PROJECT --> SYSTEM --> PERSONALIZE --> CUE MUTES TRACK
AUDIO ROUTING: Insert your DRUMS/PERCUSSION into the A/B inputs of the Octatrack and insert your MELODIC instruments into the C/D inputs. This is important for the effects to sound as intended.
TO RECORD A MASTER LOOP:
Method 1: Select Track 4 and PRESS REC-3 once, this will initiate a recording at the next 8 bars. Wait until you see the + (recording) symbol on track 4 and press REC-3 once. After the recording has finished and the + symbol is now a play arrow, cross fade to FX scene 16 with a swift motion (do not do this slowly) to switch to your recorded 8 bar loop.
Method 2: Press YES. Be sure you are not in step edit mode (no red record button). Select Track 4. Wait until you see the + (recording) symbol on track 4 and press REC-3 twice. After the recording has finished and the + symbol is now a play arrow, cross fade to FX scene 16 with a swift motion (do not do this slowly) to switch to your recorded 8 bar loop.
1. Turn off time-stretch. In my templates you would do this on track 4 (On a per PART and per BANK basis) To do this double press the SRC page and with the E encoder change the settings to OFF.
2. Manually change the bar length in the audio editors attributes page so that it reads 8-bars (after you have finished recording the sample/loop)
3. Change to recording quantization to 4-bars by changing the RLEN (record length) in the REC 1 Edit page to 64 steps.
TO RECORD A MASTER LOOP ON AN OCTATRACK MK1:
Press Track4 + MIDI together to start recording at start of pattern.
Watch for the +> icon next to the track.
Track4 + MIDI again so recording will stop at end of pattern.
Engage Scene 16 for the looper (scene param locks to unmute the amp level on Track 4)
_____________________________________________________________________________
TO RECORD TO TRACKS 5-7: Select the track you wish to record on and press REC 1 for Inputs A/B (pre-effects), press REC 2 for Inputs C/D (pre-effects), Press REC 3 to record Post-FX either input.
Several of the effects in this template require you to understand this operation. These effects are pointed out in the effects map below.
***Recording without record quick mode enabled will require you to hold track 4 and press REC-3 twice as opposed to just pressing REC-3 twice after the recording has initiated.
***Recording without record quick mode enabled will require you to hold track 4 and press REC-3 twice as opposed to just pressing REC-3 twice after the recording has initiated.
TO SAVE A RECORDING TO FILE: Press FUNC + REC 3 and choose "Save This Recording". This is useful for creating stems to save and use in other projects or to transfer to your computer.
SIDE-CHAIN PUMPING: To engage sidechain pumping of inputs C/D select track 1 and turn up LFO 1 Depth.
COMPRESSORS: A compressor is available on input Track 1 which applies a gentle buss compression pre-fx. To set custom compressor values for each pattern, lock the compressor effect parameters on the first step of Track 1 within each pattern. When changing parts if you have locked in compressor settings on the step sequencer the compressor wont kick in until it triggers that step.
STUTTER FX: FREEZE DELAYS are available separately on Tracks 1 and 16. To use the the FREEZE DELAY hold FUNC + DOWN ARROW and select DELAY CONTROL. GREEN button 9 controls the FREEZE DELAY for inputs A/B + C/D. Press 16 to FREEZE the entire mix via master track. FREEZE DELAY 9 occurs before effects are applied so you can hold a frozen buffer and then apply effects. Hold GREEN button 16 to freeze the entire mix POST FX. Have fun with this.
MASTER EQ: To use the master equalizer lock in your preferred EQ parameters on step 1 and 2 of track 8. Track 8 is only 2 steps long. This way when you switch parts the EQ will remain the same.
TO PROCESS STATIC/FLEX TRACKS THROUGH THE BUILT IN EFFECTS: Press CUE and select track 5, 6, and 7. Make sure CUE is set to 'CUE Mutes Track' in the Project settings under personalize. Set CUE to +12 in the MIX menu. Run the CUE outputs into the inputs of the A/B or C/D or into the another machines stereo inputs that would be running into those inputs. Turn on DELAY COMPENSATE in the CONTROL menu under the INPUT section.
2.5.24
- Fixed a retrigger on Track 4. Should be no more click at the beginning of 8 bar loops
- CUE was not active on tracks 5, 6, or 7
- Added AB, CD as default sources for recording on FLEX tracks
- Removed the PAT LENGTH Record Quantization
Report bugs here, on Discord, or via email: ezbot84@gmail.com
12.15.23
- DJ EQ was being applied twice when it came to recording 8 bar loops. This has been corrected.
11.21.23
- Updated manual with instructions on how to record 8 bar loops with Octatrack MK1's.
- Adjusted several effects.
- Adjusted gain settings for CUE and MAIN.
FX BLOCKS: Space, Build, Crush, Party
56 Scenes across 4 Parts. To move to a different set of 16 scenes/fx press PART and use the arrow keys to select a new SET OF 14 EFFECTS.
Part 1 - Space
1. Hallway Riser
2. Space Return
3. 1/2 Note Filtered Looper *
4. Surco Riser V2
5. Space Drummer
6. Acid Delay
7. Melody Pass
8. EZ Drummer *
9. High Pass Filter
10. Low Pass Filter
11. Resonate High Pass
12. Low Pass Riser *
13. Dirty High Pass Delay
14. User Defined **
15. User Defined **
16. Master Looper (Requires RECORDING of both A/B and C/D, Select Track 4 and press REC 3. Wait for recording to begin and press REC 3 a second time)
Part 2: Build
1. Chorus Riser *
2. Big Stereo Riser *
3. Stereo Drum Riser *
4. Stereo Drum High Filter
5. Modulated Chorus Filter
6. Off World Filter
7. Chorus and Smile Pass 1/2 Note Looper *
8. Chorus and Smile Pass
9. High Pass Filter
10. Low Pass Filter
11. High Pass Rhythm Verb
12. High Pass Rhythm Verb Looper *
13. Corridor Slide
14. User Defined **
15. User Defined **
16. Master Looper (Requires RECORDING of both A/B and C/D, Select Track 4 and press REC 3. Wait for recording to begin and press REC 3 a second time)
Part 3: Crush
1. Crush Filter
2. Burning Filter Mod
3. Death Punk Filter *
4. Ghost *
5. Poltergeist *
6. Boiler Room
7. Walk Lightly Buildup *
8. Lo-Fi-Hi Pass
9. High Pass Filter
10. Low Pass Filter
11. Dreamy High Pass
12. EZ Drummer 3
13. Data Stretch Filter
14. User Defined **
15. User Defined **
16. 16. Master Looper (Requires RECORDING of both A/B and C/D, Select Track 4 and press REC 3. Wait for recording to begin and press REC 3 a second time)
Part 4: Party
1. Echo Freeze (16th notes) *
2. Modulated Echo Freeze *
3. Daft Punk Effect Alternate Version *
4. LFO Twist *
5. LFO Twist 2 *
6. Auto Pumper
7. Lo-Fi Build
8. Lo-Fi Tape Stop *
9. High Pass Filter
10. Low Pass Filter
11. Space Breaker
12. Slow Death (song ender) *
13. Reverse (Requires RECORDING of both A/B and C/D, Select Track 4 and press REC 3. Wait for recording to begin and press REC 3 a second time)
14. User Defined **
15. User Defined **
16. 16. Master Looper (Requires RECORDING of both A/B and C/D, Select Track 4 and press REC 3. Wait for recording to begin and press REC 3 a second time)
Have fun,
EZBOT